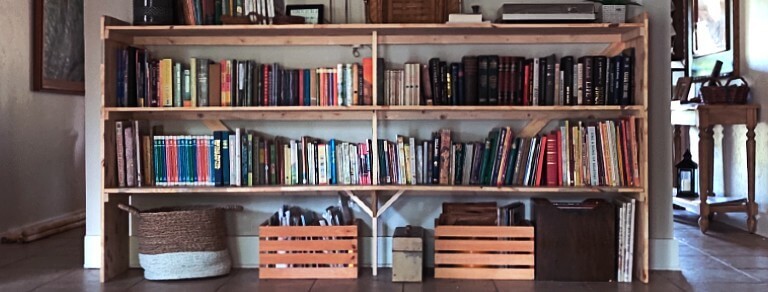
My wife asked me recently if I knew how to build a bookshelf that could hold all the books we had scattered about the house. Sure, I can do that, I replied. Now when I go to build a bookshelf, I build one that is solid, overbuilt and sturdy enough to support the roof. Her version of a bookshelf, well let’s just say simple, open and minimal using as few materials as possible.
Pretty much exactly the opposite of how I would build a bookshelf! So after a few iterations on paper, here is the design we ended up with.
She posted the final result on her instagram page @KeriBotch and it got a ton of reaction from people wanting to know how to build a bookshelf. So, I decided to put a post together showing what I did. By the way if you’re looking for great homeschool information you should check out her page!
The bookshelf is 4 feet tall and 8 feet wide. I designed it to fit across our wall and have enough room between shelves to hold tall books. If you wanted to build a bookshelf like this, you could scale the dimensions pretty easily to fit your living space. If you need help with that, feel free to just ask.
If you attempt to build this bookshelf, do so at your own risk and with your own specific circumstances and skills in mind. The design here is my own and was not in any way tested for safety, load or stability.
Because the design of the bookshelf was simple, I really didn’t need much in the way of materials. Here is a quick shopping list of everything I used to build the bookshelf.
Shopping List
Wood / Finish:
4 – Spruce / Pine Appearance Boards – 3/4-in x 16-in x 8-ft
5 – Whitewood Board – 1-in x 2-in x 8-ft
1 – Whitewood Board – 1-in x 3-in x 8-ft
1 – Small container of wood filler (Get the stainable kind if you plan to stain the shelves)
1 – Bottle of wood glue
Hardware:
1 Box – DEWALT Finish Nails, 1-1/2-Inch, 16GA, 2000-Pack (DCS16150)
1 Box – Paslode, Finishing Nail, Straight, 16 Gauge, 2,000 per Box, 2 inch
NOTE: I personally use a pneumatic nailer because, well, it’s just easier. If you wanted to go old school though, you could use polished finishing nails. In fact, I used some of these because I was teaching my 7 year old son how to swing a hammer!
1 Box – Polished Finishing Nails (6D x 2″)
1 Box – Polished Finishing Nails (4D x 1.5″)
1 – Center Punch to countersink the nail heads
Tools
A note on tools – The tools you chose to use are personal preference and you should use what you are comfortable using that will produce the best results for you.
I primarily used two types of tools building this, hammers and saws. I also used a measuring tape, 2 small clamps, a nail punch, carpenter’s square and speed square.
Okay down to the nitty gritty on how to build a bookshelf!
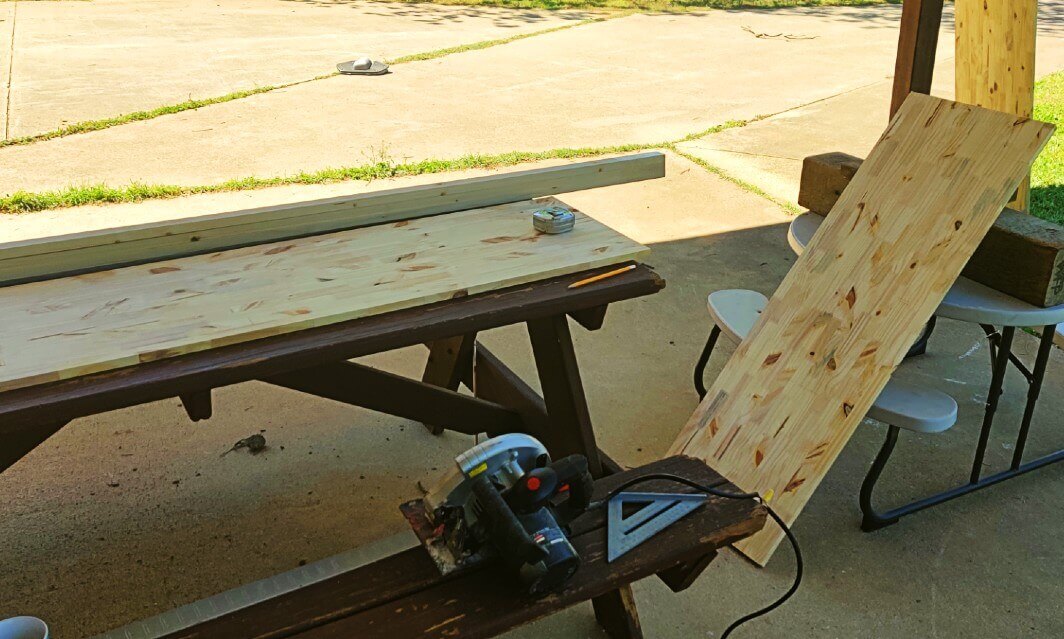
How to Build a Bookshelf – Step 1
Measure longways to the center of one 16 inch wide appearance board (It should be 4 feet). Place a mark at the center with a pencil, then using a carpenter’s square draw a straight line across the width of the board.
As a side note: When I am trying to find the center of a board, I always confirm my mark from both ends of the board.
Remember the rule measure twice and cut once!
Once you are sure that you have the center marked, cut the board.
These are going to become the sides of the bookshelf.
How to Build a Bookshelf – Step 2
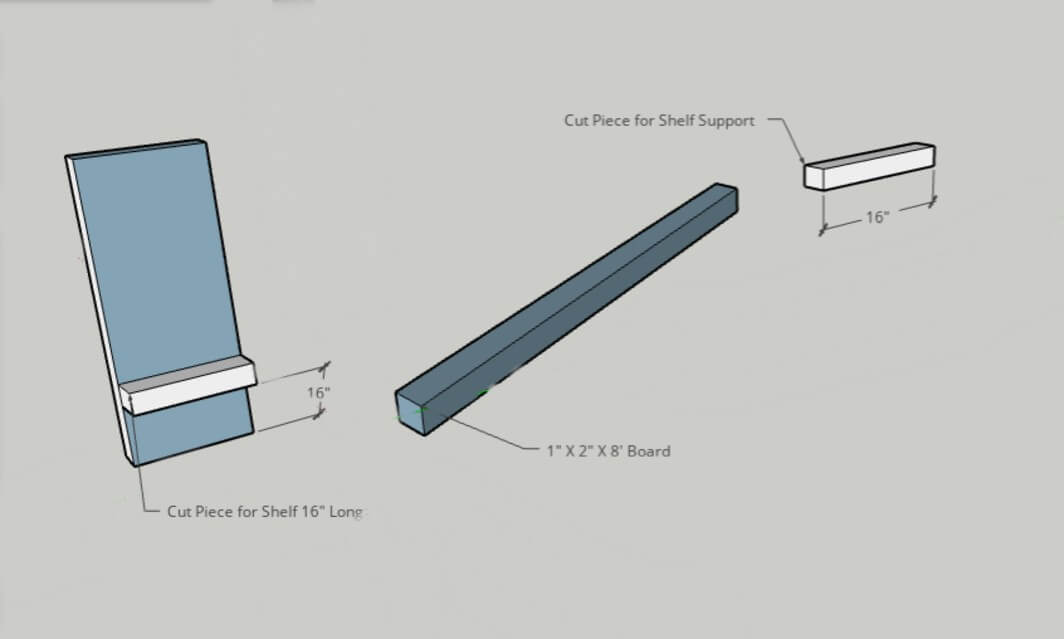
Choose one of the two 4 foot appearance boards you just cut. Measure longways from one end 16 inches and place a mark with your pencil. Then using a carpenter’s square draw a straight line across. This is where we are going to place our first shelf support.
Next take one of the 1” X 2” X 8’ boards and measure 16 inches from the end (This should be the width of the appearance board).
Once you are sure of the measurement, cut the 1” X 2”.
Place a bead of glue along the center of the 1” X 2” board, then clamp it across the width of the appearance board lining the top of it up with the line.
Make sure it is straight across, the end of the shelf will rest on top of this. Once you are happy with the location, nail it in place using the 1 ½ inch nails.
How to Build a Bookshelf – Step 3
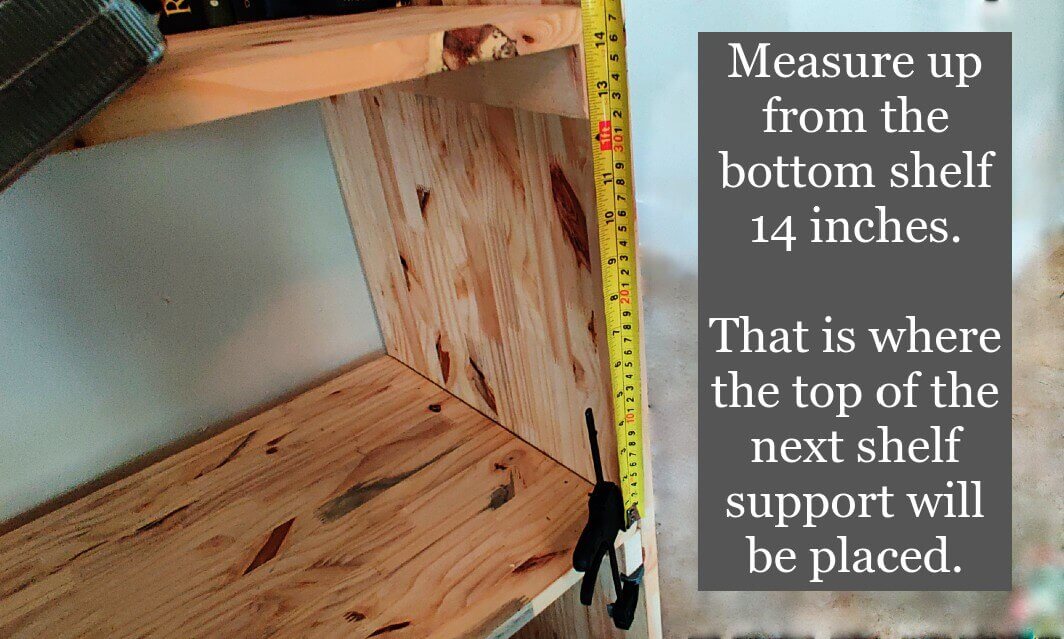
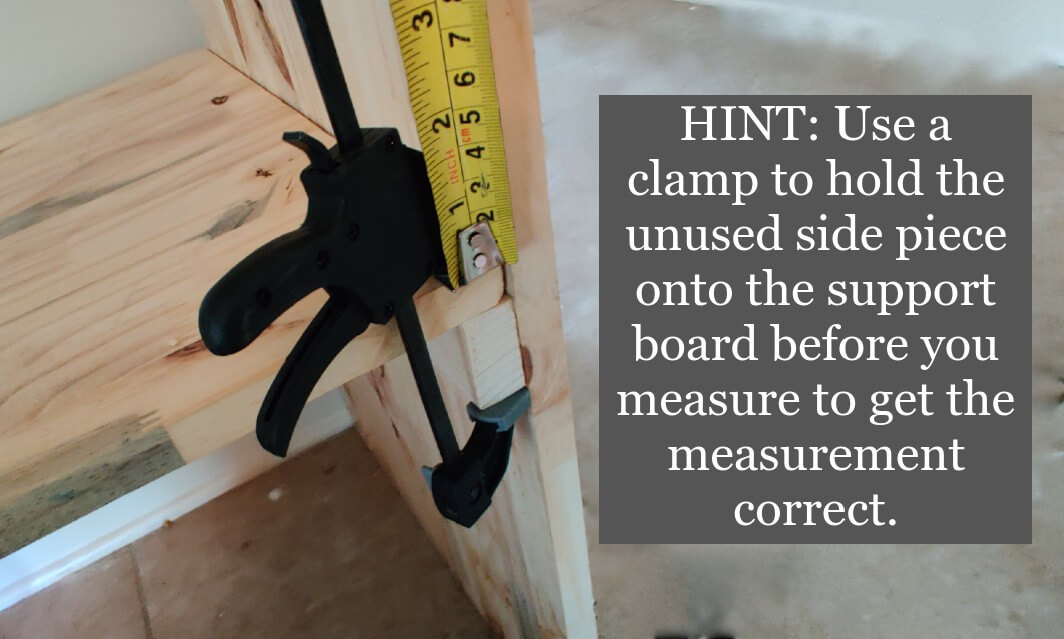
Take the unused 4 foot appearance board, clamp it in place atop the 1 X 2 you just nailed in place. Measure toward the top 14 inches and place a mark with your pencil. Then using a carpenter’s square draw a straight line across.
Unclamp and remove the 4 foot appearance board.
Next cut another 16 inch piece off the 1” X 2” you already cut.
Place a bead of glue along the center of the board you just cut, then clamp the 1” X 2” across the width of the appearance board lining the top of it up with the line.
Again, ensure it is straight across, then nail it in place.
Repeat this process one more time.
In the end you should have a board that has three 1” X 2” boards spanning across it at roughly the following locations:
16 inches form one end
30 ¾ inches from the end
45 ½ inches from the end
How to Build a Bookshelf – Step 4
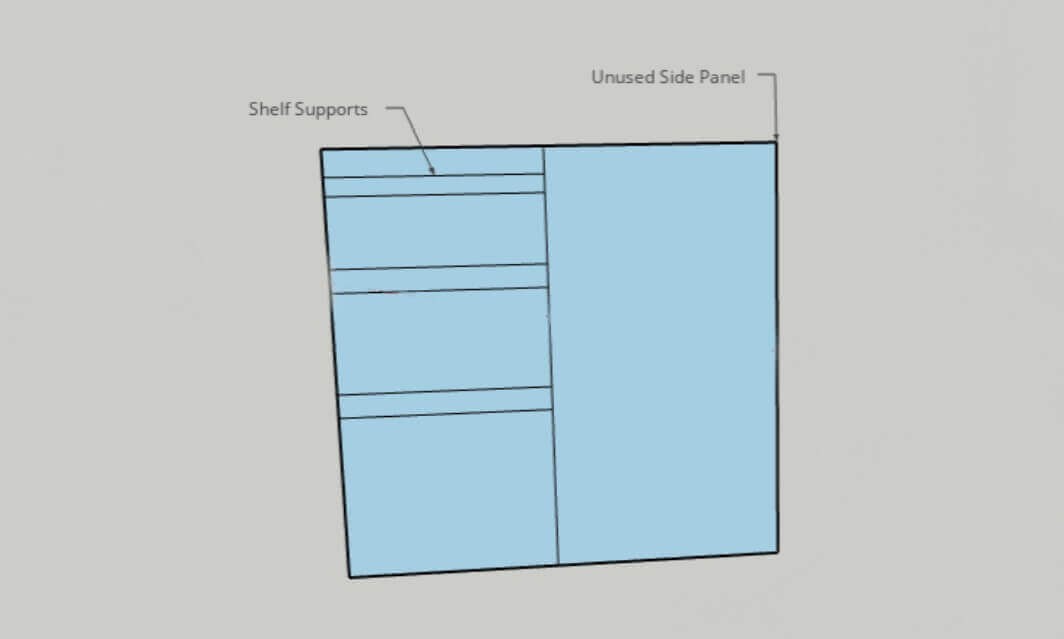
Place the two short appearance boards side by side, with the 1” X 2”s facing up.
Important: Be sure you line up the ends of the boards exactly even.
Using your carpenter’s square, draw a line straight across the second appearance board (The one without the 1” X 2” support boards nailed to it). The line should be even with the top of the 1” X 2” support boards you nailed in place on the first side.
Now cut three more 16 inch pieces from the 1” X 2” and nail and glue them just like you did on the first side.
Remember these need to line up. If they don’t the shelves will be crooked!
How to Build a Bookshelf – Step 5
Time to assemble the bookshelf!
Be sure you find a flat surface. Laying the boards on edge width wise, clamp one of the 8 ft appearance boards to the top of the lowest 1” X 2” support. Be sure you line these up edge to edge or your shelves will not be flush with the sides.
Don’t worry if it’s not perfectly square at this point, just get it close.
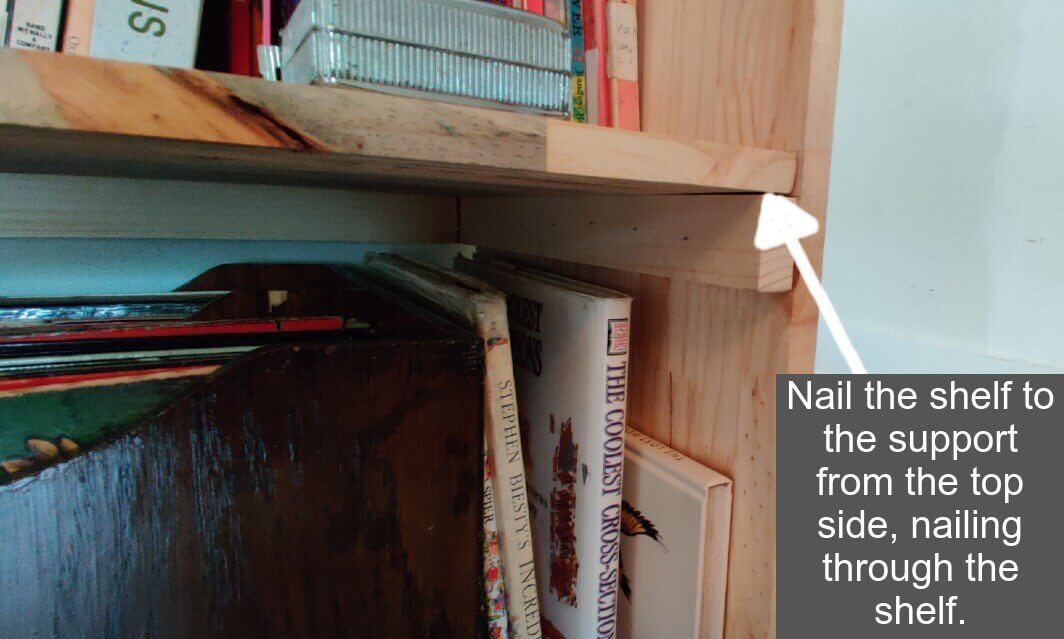
Using the 1 ½ inch nails nail through the top of the shelf and into the 1” X 2” support board.
Repeat this process for the remaining two shelves.
NOTE: Do not attempt to stand the shelves up at this point, they are not stable and will very likely collapse.
How to Build a Bookshelf – Step 6
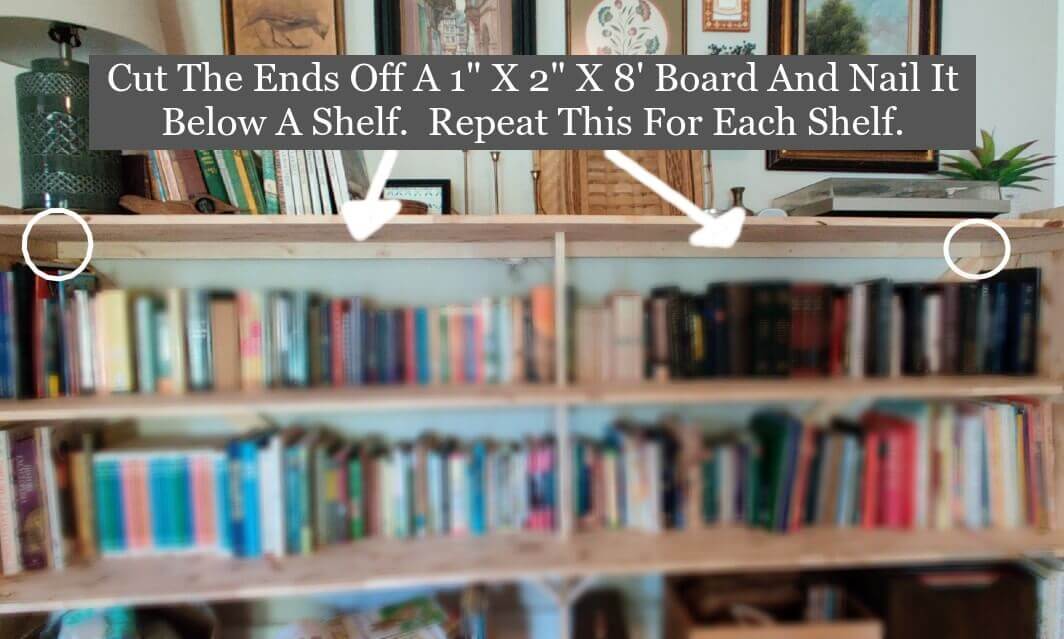
The 8 foot long shelves are pretty flimsy so I needed to shore them up a bit. I did that by taking one of the remaining 1” X 2” boards and clamping it parallel to a shelf so the 2 inch side was perpendicular with the bottom of the shelf.
You will notice that it overlaps the support boards on the sides. That’s okay. Take your pencil and mark the ends of the 1” X 2” so that it will fit between the support boards.
Cut the board on your marks, then clamp it back in place. You want this board to be inside the sides and flush with the bottom of a shelf and the back edge of the bookshelf.
Once you are happy with the position, nail through the shelf and into the 1” X 2” all along the back every 4 to 6 inches using the 1 ½ inch nails.
Finally, using a 2 inch nail, nail through the side and into the 1” X 2” you just nailed in place.
Repeat this process for the remaining shelves.
How to Build a Bookshelf – Step 7
Get someone to help you stand the bookshelf up at this point. It should be relatively stable, but if you pushed hard, it would collapse, so be careful.
Cut the 1” X 3” X 8’ in half so you have two 4 foot pieces.
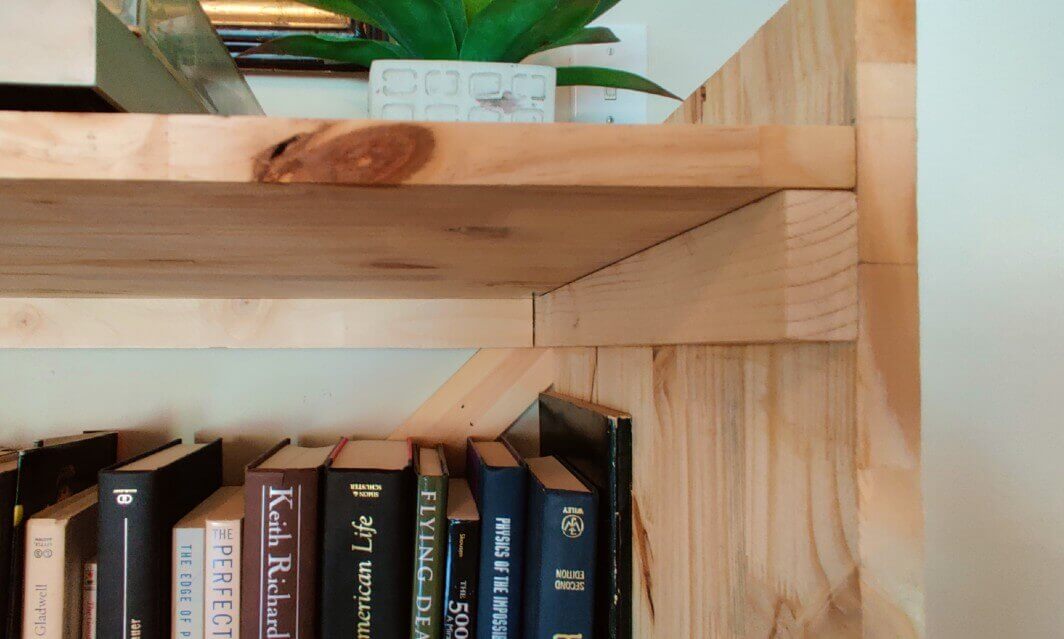
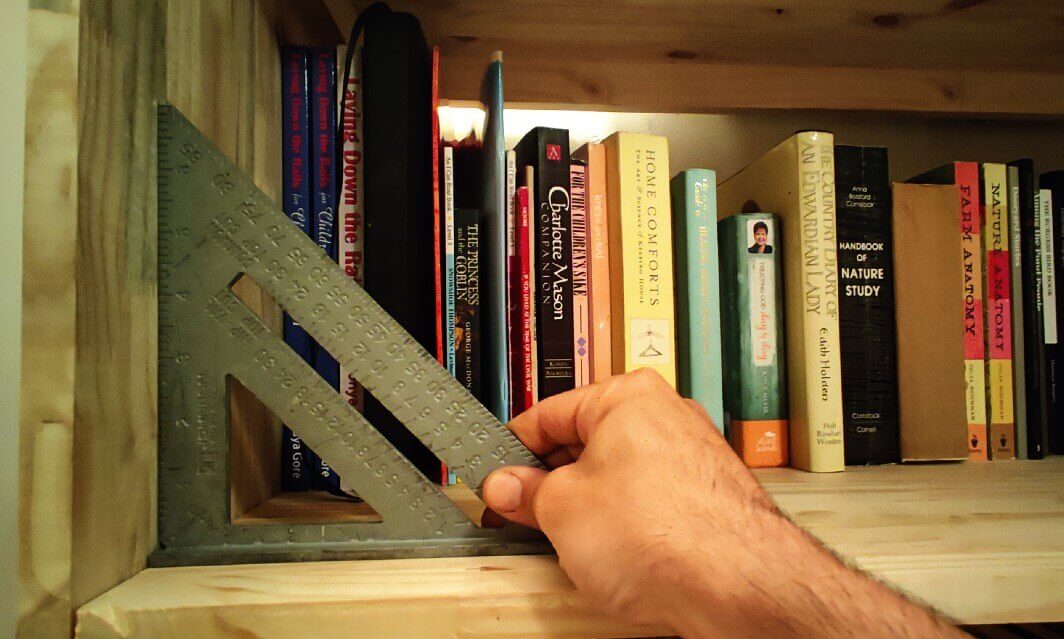
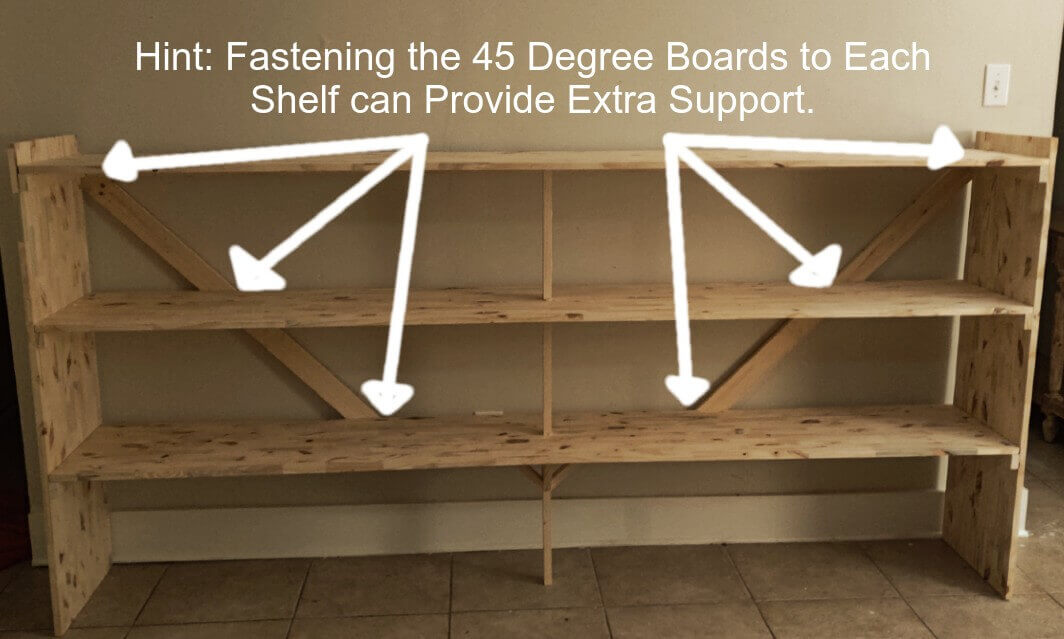
Time to square up the bookshelf. You need to cut one end of a 1” X 3” on a 45 degree angle. Clamp it in the top right corner at the rear of the bookshelf.so that your cut is parallel edge and even with the side of the bookshelf. Then place a speed square in the corner between the middle shelf and the side.
Hold the bookshelf square and mark the bottom of the 1” X 3”.
NOTE: This is much easier with two people, one person can hold the book shelf square while the other measures.
Cut the bottom edge of the board. Clamp it back in place then nail it in using a combination of 1 ½ inch and 2 inch nails.
Repeat this process on the other side.
At this point your bookshelf should stand on its own, but the shelves themselves still need some help.
How to Build a Bookshelf – Step 8
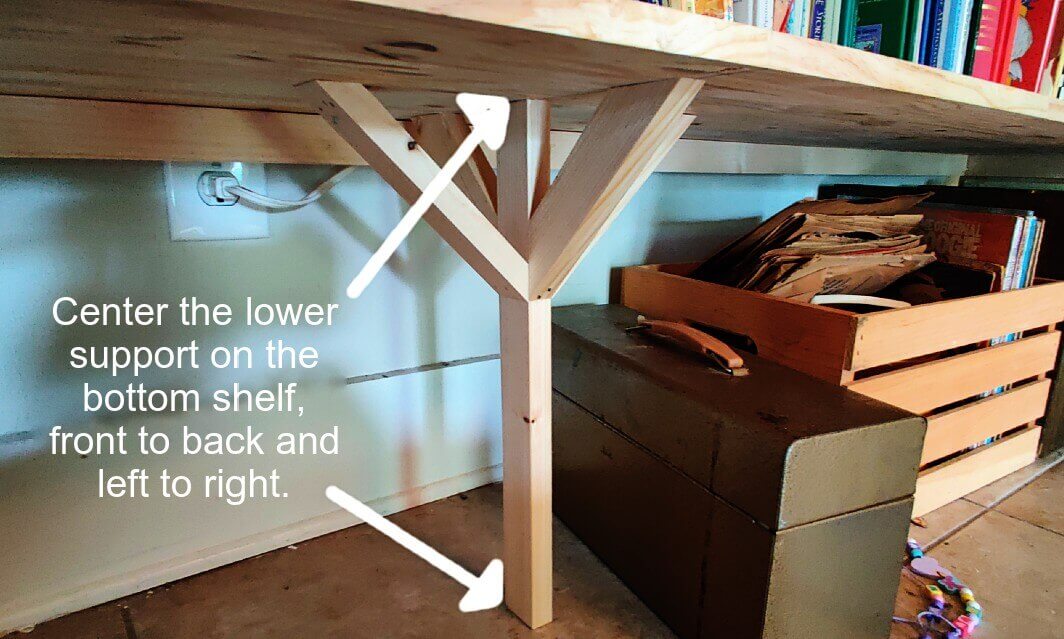
Measure to the very center of the bottom shelf on the underside. (end to end and front to back) and place a mark with your pencil.
Now hold the shelf level with the floor and measure from the center to the floor (This should be 16 inches). Cut the end of the last 1” X 2” to match your measurement.
Place the center of one end of the cut 1” X 2” on your mark and take it to the floor. Be sure it is turned so the wide part of the board is parallel to the side of the bookshelf.
Once you’re happy with the location, put two 1 ½ inch nails through the top of the bottom shelf and into the board.
Now we are going to repeat this process between the lower shelf and the middle shelf and finally again between the middle shelf and top shelf.
Be sure all the boards line up perfectly on top of one another before you nail them.
Once all the boards are in place, toe nail (Nail at a 45 degree angle) the bottom of the top and center boards to the shelves below using the 1 ½ inch nails.
How to Build a Bookshelf – Step 9
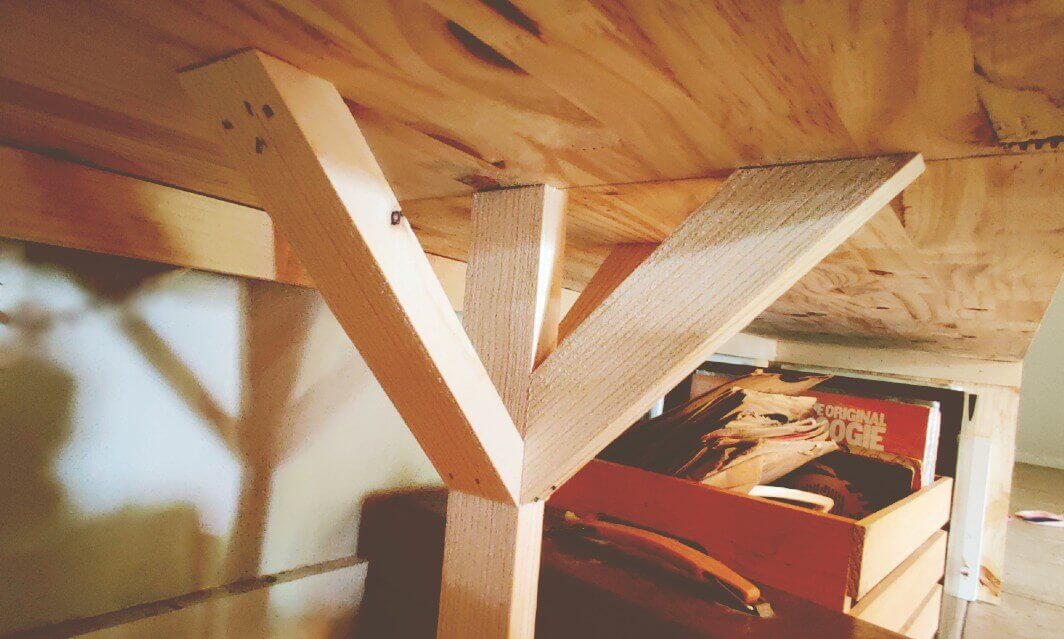
Finally, I added a little bit of additional support to the bottom just so the leg wouldn’t come loose while moving the shelves around.
With the remaining bit of 1” X 2”, cut a 45 degree angle on one end on the skinny side. Then measure and cut the opposite end so that you have a brace that is on a 45 degree angle at least ⅓ of the length of the board.
Cut a matching piece for the other dies and nail it in place between the bottom of the lower shelf and the center support board.
Repeat this process on the fat side so that you have 4 supports on the lower portion.
Conclusion
Remember to go back and fill all the nail holes with the wood putty for a more finished look. If you ended up hand nailing everything, be sure to counter sink the nails using the punch.
That’s it, it was fun to build and ended up as a pretty simple design that is working for us. You could do so many other things with this design too, you could put stiles on the front and give it a more “finished” look. You could stain it or coat it with varnish or shellac, etc. or you could use different materials, or add additional supports.
Well you get the idea, the sky’s the limit.
If you decide to tackle this project, let me know how it goes! Post pictures or suggestions too.
